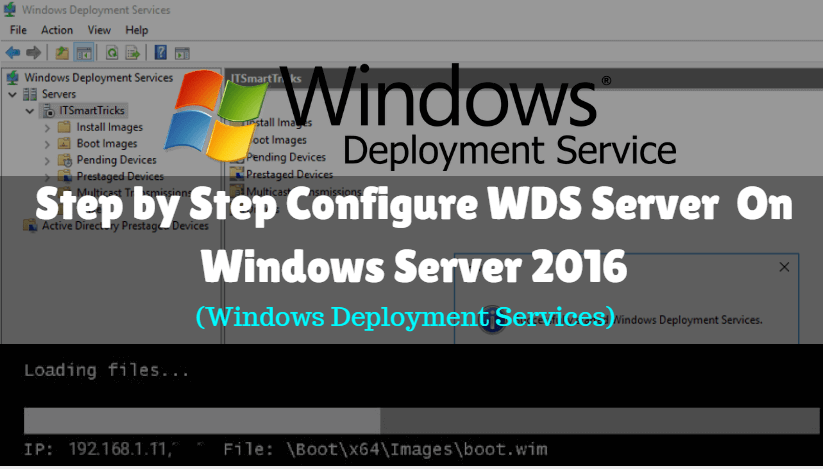
In this article, we are going to learn ‘Step by Step Configure WDS Server (Windows Deployment Services) On Windows Server 2016’. Due to the increase in information technology (IT) solutions in organizations, the number of actual and virtual server images has also increased. Due to this situation, the deployment of operating systems takes longer to complete and requires valuable institutional resources. As a result, companies are looking for new ways to automate the service delivery process. Virtual machine environments have become ubiquitous in a datacenter and having the ability to deploy virtual server roles and workloads while deploying an operating system is an important part of the application process.
 On Windows Server 2016")
Windows Deployment Services (WDS) is a service role that allows you to deploy the Windows operating system to a PXE-enabled client. You can install a Windows operating system on a PXE-capable client without the need for physical media. Besides, it allows you to deploy a Windows operating system to multiple clients at the same time. In this way, reducing the entire installation time. WDS makes your life easier. You do not have to go to another room in the same room to deploy the operating system with the necessary software and drivers. Administrators can schedule schedules for deployment. The next day when you come in and log in to your computer, you will be installing a new operating system. In addition, drivers and software have been installed.
WDS Functions:
• Allows you to install a network-based operating system.
• Facilitate the process of deployment.
• Supports deployment of computers without any installed operating system.
• Provide end-to-end deployment solutions for clients and server computers.
• Use existing technologies like Windows PE, Windows Image File (.wim) and virtual hard disk (.vhd and .vhdx) image files, and image-based deployment.
Hardware Requirements:
- RAM: minimum of 4GB
- Processor: 64-bit processor
- Hard Drive Space: At least 10GB Or Depend On OS ISO and Software’s Size.
Prerequisites to Configure WDS Server:
Before configuring the WDS server, your server must be sure that the following requirements are met.
1)Changed Windows Server Hostname.
2)Turn off Windows Server Firewall.
3)Set Static IP on Windows Server.
 On Windows Server 2016")
4)Install and Configure DHCP Role.
You have learned in the previous article that ‘How To Configure DHCP Server Role on Windows Server 2016‘ Now let’s configure the DHCP Scope for this. Now go to Server Manager and right-click on the DHCP server and click on DHCP Manager.
 On Windows Server 2016")
Also Read – How To Configure DHCP Server Role on Windows Server 2016.
Now firstly expand the domain, then right-click on IPV4 and create a new scope.
 On Windows Server 2016")
The new scope window will open, then click on Next for further process.
 On Windows Server 2016")
Enter a scope name to identify which is the scope, and then click on Next.
 On Windows Server 2016")
Set the IP address range as the snapshot below. As you set up the IP address range, the IP address will be assigned to the client in the same range. Also, give the Length and Subnet mask and click on Next.
 On Windows Server 2016")
If you want to exclude the IP address set in the DHCP server, you can add it to the IP address ‘Exclusions and Delay‘. I’m not adding the IP address, if you want to, you can add the IP address.
 On Windows Server 2016")
The default 8 days in lease duration is set, which means that the client can use an IP address for 8 days. If you want to change the lease duration, you can change it.
 On Windows Server 2016")
If you want to have options like DNS servers and WiNS, click the yes button. Then click Next.
 On Windows Server 2016")
Set the IP address of these routers or default gateways, then click on the add button.
 On Windows Server 2016")
Enter the DNS server IP addresses that you would like your client to use
 On Windows Server 2016")
If you do not have a DNS server in the network, use the WINS server.
 On Windows Server 2016")
You can see that all the steps are done, now just click yes to activate the created scope.
 On Windows Server 2016")
The created new scope has been completed. Now click Finish.
 On Windows Server 2016")
Now you can see in the following snap New Scope has been activated.
 On Windows Server 2016")
Also Read – Configuration Of DHCP Reservation On Windows Server 2016.
Follow the below Steps To Install and Configure WDS Server (Windows Deployment Services) On Windows Server 2016:
Installation of WDS:
Step 1. Open Server Manager.
Step 2. Click Add Role and Features.
Step 3. Read the important requirements and try to meet them (this includes a strong password for the administrator account, stable IP configuration, and installation of the latest security updates). Click next to continue.
Step 4. Choose Roll-based or Feature-based installation and click Next.
Step 5. Select the destination server for WDS from the server pool and click Next.
 On Windows Server 2016")
Step 6. Select Windows Deployment Services from the server role. When you check that option, a new window will pop up. Click Add Features.
Step 7. Click Next two times.
 On Windows Server 2016")
Step 8. Click Next (Leave default selection of both deployment and transport server)
 On Windows Server 2016")
Step 9. Click Install
Step 10. Wait for the installation to complete. It may take several minutes to close.
 On Windows Server 2016")
Configuration of WDS:
Step 1. Open Server Manager Dashboard. Tools -> click Windows Deployment Services.
Step 2. Right-click on your WDS server and then click Configure Server.
 On Windows Server 2016")
Step 3. Read the pre-requisites and click next.
Step 4. Choose “Integrate with Active Directory“, If you have configured AD on my network. If you do not have AD configured and you are configuring WDS in standalone mode, select the standalone server. Click Next
 On Windows Server 2016")
Step 5. Provide a route to your NTFS drive where you want to store a boot image, install images, PXE boot files and WDS management tools. Click Next.
 On Windows Server 2016")
Step 6. I have configured DHCP on the same WDS server. So check both boxes and click next.
 On Windows Server 2016")
Step 7. Choose ‘Respond to all client computers‘ (known and unknown).
 On Windows Server 2016")
Step 8. Wait for the wizard to finish (this may take a few minutes to complete).
Step 9. Click Finish.
 On Windows Server 2016")
Add Install Images to WDS:
When you configure Windows Deployment Services on your server, the next step is to add an image to your WDS to the client machine. There are two types of images that you need to add. There is an install.wim (actual Windows installation files) and the other is boot.wim (used to boot client machines).
Step 1. Open windows deployment services console.
Step 2. Expand your server.
Step 3. Right-click on Install Images and then click Add Install Image.
 On Windows Server 2016")
Step 4. Provide the image group name and then click Next.
 On Windows Server 2016")
Step 5. Browse to the source folder (located on your Windows installation CD/DVD or local hard drive).
 On Windows Server 2016")
Step 6. Choose the install.wim file and click Next.
 On Windows Server 2016")
Step 7. Click Next.
 On Windows Server 2016")
Step 8. Select Image and Click Next.
 On Windows Server 2016")
Step 9. Check Summary and Click Next.
 On Windows Server 2016")
Step 10. Wait for the file to be copied. (This can take several minutes to complete).
Steps 11. Click On Finish.
 On Windows Server 2016")
Steps 12. As you can see on the output above we have successfully added the install.wim Image File.
 On Windows Server 2016")
Add Boot Image to WDS:
Step 1. In the Windows deployment services console, right-click boot image.
Step 2. Click on the Add boot image.
 On Windows Server 2016")
Step 3. Browse to the source folder of your CD/DVD and locate boot.wim.
 On Windows Server 2016")
Step 4. Click Next.
 On Windows Server 2016")
Step 5. Rename Image File and Click Next.
 On Windows Server 2016")
Step 6. Check Summary and Click Next.
 On Windows Server 2016")
Step 7. Wait for the file to be copied. (This can take several minutes to complete).
Steps 8. Click On Finish.
 On Windows Server 2016")
Steps 9. As you can see on the output above we have successfully added the boot.wim Image File.
 On Windows Server 2016")
Configure DHCP Scope Options:
Enabling bare-metal client systems on Windows Deployment Services (WDS) PXE-boot to kickstart the process of deploying Windows PE on a client system and running the Windows system. In some WDS environments, you might want to configure the following DHCP options to direct your PXE clients to the correct network boot file.
Steps 1. Now go to Server Manager and right-click on the DHCP server and click on DHCP Manager.
Steps 2. Right, click on Scope Options and click Configure Options.
 On Windows Server 2016")
Steps 3. Add Boot Server Hostname or IP in cope Options.
66 = DNS name of the WDS server
 On Windows Server 2016")
Steps 4. Option 67 Where can you get the boot file name to configure? This name will be something similar to boot\x64\wdsnbp.com where this route corresponds to the Remount folder on the WDS server.
67 = boot file name
 On Windows Server 2016")
Steps 5. Finally, we can start the WDS server. The WWS server has not been configured only. Right-click on the WDS server. hover your mouse over all the tasks, then click Start. Soon after the WDS server starts.
Note – Connect LAN with WDS server to switch or the client computer and start WDS server.
 On Windows Server 2016")
As you can see on the output above we have successfully started the WDS server.
 On Windows Server 2016")
Also Read – Step by Step Configure MDT Server (Microsoft Deployment Toolkit) on windows server 2016
Deploy Windows with WDS:
Steps 1. The client will want to install the Windows os of the system. First of all, connect the first WDS server to the client computer with a LAN cable. To confirm the same you can use the DHCP Address Lease.
 On Windows Server 2016")
Steps 2. Boot Client System With Network.
 On Windows Server 2016")
Steps 3. Check WDS IP and Hostname and press F12 to Deploy Windows.
 On Windows Server 2016")
The machine is booting via network and windows os files loading starts.
 On Windows Server 2016")
Steps 4. Select your location and Keyboard Language.
 On Windows Server 2016")
Steps 5. Enter WDS Credentials and connect WDS.
 On Windows Server 2016")
Now you can install windows on a client computer with a normal windows installation process.
Also Read – System Requirement and Installation Windows Server 2016.
That’s all, In this article, we have explained step by Step Configure WDS Server (Windows Deployment Services) On Windows Server 2016. I hope you enjoy this article. If you like this article, then just share it. If you have any questions about this article, please comment.
Hi, I do believe this is a great web site. I stumbledupon it 😉 I am going to return once again since i have bookmarked it. Money and freedom is the greatest way to change, may you be rich and continue to guide others.