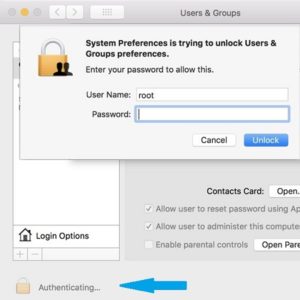
Apple’s company released a new security update 2017-001 due to increasing cyber-crime in the world. As well as a macOS High Sierra Root Access bug, the hackers could get the blank password as root access to the superuser account. This security update was released to fix Fix macOS High Sierra Root Access Bug. This security update will automatically update to all Macs systems. In this article, we will see how to Fix the Mac OS High Sierra Root Access Bug.
The effect of Mac OS High Sierra Root Access Bug probably does not occur on macOS Sierra 10.12.6 and earlier. The effect of the Mac OS High Sierra Root Access Bug is if the system administrator has a blank password. If you have a macOS High Sierra 10.13.1 update, restart the system to know whether to have MRTConfigData 1.27 in the installations list. If your system has 10.13.1 update and MRTConfigData 1.27, your system is secure.
To see if your system has Security Update 2017-001, open the Applications folder and open the Terminal app from the Utility folder and press the following paths and check Security Update 2017-001.
what / usr / libexec / opendirectoryd
Now we need to change the password by enabling the root account in the system.

Follow the below steps to Fix macOS High Sierra Root Access Bug & Change Root Password
To Fix the Root Access Bug, follow the process below.
1)Go menu:
Go to the menu in the system and go to the ‘Open to Go’ folder.
2)Applications Path:
To open Directory Utility, enter the following Applications path and click on Go.
/System/Library/CoreServices/Applications/
3)Open Spotlight:
Press Command + Space to open Spotlight.
4)Directory Utility app:
Now open the Directory Utility app and open it.
5)Lock Icon:
Now click on the ‘Click the lock to make changes’ option.
6)Enter User Name and Password:
Click the lock to make changes option and enter the administrator account for the username and password.
7)Modify Configuration:
After entering the username and password of the administrator account, click Modify Configuration.
8)Root Password:
Now when you click on Modify Configuration, please change the new root password and verify it and click on OK
9)Click Again to Lock:
Next, click on the lock in the directory utility window and prevent more changes.
10)Quit Directory Utility:
In this way the root password has changed, now the Directory Utility window is closed.
Also Read- How To Fix Missing Error or Not Found msvcr80.dll.
That’s all, In this article, we have explained HOW TO Fix macOS High Sierra Root Access Bug And Change Root Password. I hope you enjoy this article. If you like this article, then just share it. If you have any questions about this article, please comment.
