In this article, we are going to learn ‘Configuring DNS Reverse Lookup on Windows Server 2019’. A domain name system is a hierarchical and decentralized naming system for computers or services or other resources connected to the Internet or private networks. It associates various information with the domain names assigned to each of the participating entities.
DNS Reverse lookups are configured by nslookup to check IP that name query. nslookup is a network administration command-line tool available for most computer operating systems to query domain name systems for a domain name or IP address mapping or other DNS records. The name “Nslookup” means “Name Server Lookup”.
Follow the below steps to Configuring DNS Reverse Lookup on Windows Server 2019:
So to Configuring DNS Reverse Lookups just open the Run dialogue box by pressing the WIN+R button on the keyboard and type the command dnsmgmt.msc to open the Program and Features window.

Also Read – Install and Configure Active Directory-DNS on Windows Server 2012
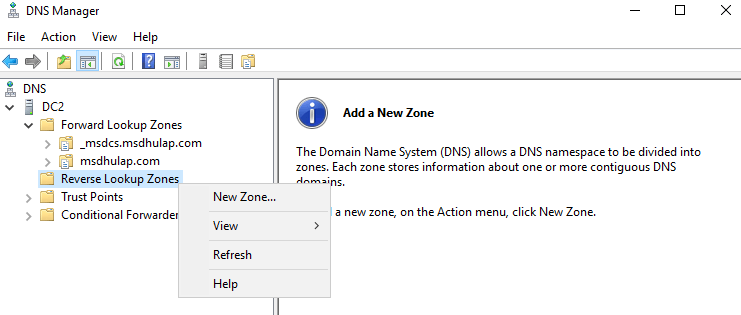
In DNS Manager, if it is not already extended, double-click the server name to expand the tree.

Select Reverse Lookup Zones, right-click Reverse Lookup Zones, and then click New Zone. The New Zone Wizard opens.

In Welcome to the New Zone Wizard, click Next.

In Zone Type, select one of the following:
- Primary zone
- Secondary zone
- Stub zone

If your DNS server is a writeable domain controller, select Store the zone in Active Directory. In the Active Directory Zone Replication Scope, select one of the following:
- To all DNS servers in this forest
- To all DNS servers in this domain
- To all domain controllers in this domain
- To all domain controllers specified in the scope of this directory partition

In the first Reverse Lookup Zone Name page, select one of the following:
- IPv4 Reverse Lookup Zone
- IPv6 Reverse Lookup Zone

In the second Reverse Lookup Zone Name page, do one of the following:
- In-Network ID, type the network ID of your IP address range. For example, if your IP address range is 192.168.1.15, type 192.168.1.
- In Reverse lookup zone name, type the name of your IPv4 reverse lookup zone.

In Dynamic Update, select the type of dynamic updates that you want to allow. Click Next.

In Completing the New Zone Wizard, review your choices, and then click

That’s all, In this article, we have explained Configuring DNS Reverse Lookup on Windows Server 2019. I hope you enjoy this article. If you like this article, then just share it. If you have any questions about this article, please comment.