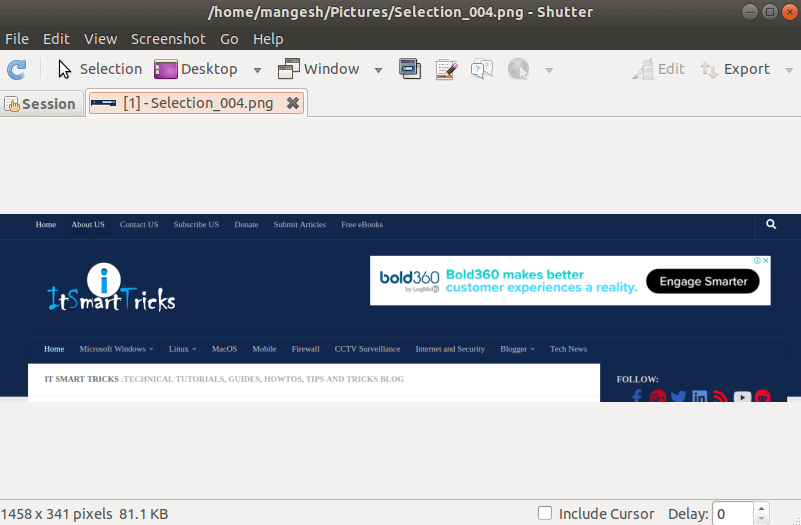
In this article, we’ll learn How to install Shutter Screenshot Tool in Ubuntu – The Best Screenshot Tool For Linux. The shutter is an open source application available for Linux-related operating systems used to capture a snapshot of any specific area or full screen on the operating system. The output image quality captured by the shutter application is very good compared to other screen capture applications. Snapshots captured using these applications can be saved in different image formats, such as jpeg, png, gif, etc.
Follow the below steps to Install Shutter Screenshot Tool in Ubuntu – The Best Screenshot Tool For Linux:
Before starting the installation, update the packages and the Ubuntu operating system repositories using the command below.
mangesh@itsmarttricks:~$ sudo apt-get update
[sudo] password for mangesh:
Ign:1 http://dl.google.com/linux/chrome/deb stable InRelease
Ign:2 http://ppa.launchpad.net/philip5/extra/ubuntu bionic InRelease
Hit:3 http://security.ubuntu.com/ubuntu bionic-security InRelease
Hit:4 http://in.archive.ubuntu.com/ubuntu bionic InRelease
Err:5 http://ppa.launchpad.net/philip5/extra/ubuntu bionic Release
404 Not Found [IP: 91.189.95.83 80]
Hit:6 http://dl.google.com/linux/chrome/deb stable Release
Hit:7 http://in.archive.ubuntu.com/ubuntu bionic-updates InRelease
Hit:9 http://in.archive.ubuntu.com/ubuntu bionic-backports InRelease
Reading package lists... Done
E: The repository 'http://ppa.launchpad.net/philip5/extra/ubuntu bionic Release' does not have a Release file.
N: Updating from such a repository can't be done securely, and is therefore disabled by default.
N: See apt-secure(8) manpage for repository creation and user configuration details.
The shutter screenshot tool is available in Ubuntu’s default repository, so we will not need to install any third-party PPA for it. So let’s go ahead and install the shutter using the command below.
mangesh@itsmarttricks:~$ sudo apt-get install shutter
Reading package lists... Done
Building dependency tree
Reading state information... Done
The following packages were automatically installed and are no longer required:
catdoc digikam-data digikam-private-libs ffmpegthumbs gdal-data
kactivities-bin kactivitymanagerd kinit kio kpackagelauncherqml
Suggested packages:
gconf-defaults-service libbonobo2-bin desktop-base libswitch-perl | perl
gnome-icon-theme libgnomevfs2-bin gamin | fam gnome-mime-data
libgtk2-perl-doc imagemagick-doc libmojolicious-perl gnome-web-photo
libimage-exiftool-perl libnet-dbus-glib-perl
Recommended packages:
The following packages will be upgraded:
imagemagick-6-common
1 upgraded, 59 newly installed, 0 to remove and 515 not upgraded.
Need to get 7,705 kB of archives.
After this operation, 51.2 MB of additional disk space will be used.
Do you want to continue? [Y/n] y
Get:1 http://in.archive.ubuntu.com/ubuntu bionic/universe amd64 libbonobo2-common all 2.32.1-3 [34.7 kB]
Get:2 http://in.archive.ubuntu.com/ubuntu bionic/universe amd64 liborbit-2-0 amd64 1:2.14.19-4 [140 kB]
Get:3 http://in.archive.ubuntu.com/ubuntu bionic/universe amd64 libbonobo2-0 amd64 2.32.1-3 [211 kB]
Get:4 http://in.archive.ubuntu.com/ubuntu bionic/universe amd64 libglade2-0 amd64 1:2.6.4-2 [44.6 kB]
Get:5 http://in.archive.ubuntu.com/ubuntu bionic/universe amd64 libgnome-keyring-common all 3.12.0-1build1 [5,792 B]
Get:6 http://in.archive.ubuntu.com/ubuntu bionic/universe amd64 libgnome-keyring0 amd64 3.12.0-1build1 [56.1 kB]
Get:7 http://in.archive.ubuntu.com/ubuntu bionic-updates/main amd64 imagemagick-6-common all 8:6.9.7.4+dfsg-16ubuntu6.4 [60.9 kB]
Get:8 http://in.archive.ubuntu.com/ubuntu bionic-updates/universe amd64 libimage-magick-q16-perl amd64 8:6.9.7.4+dfsg-16ubuntu6.4 [97.3 kB]
Get:9 http://in.archive.ubuntu.com/ubuntu bionic-updates/universe amd64 libimage-magick-perl all 8:6.9.7.4+dfsg-16ubuntu6.4 [52.9 kB]
Get:10 http://in.archive.ubuntu.com/ubuntu bionic/universe amd64 gconf2-common all 3.2.6-4ubuntu1 [700 kB]
We have successfully installed the shutter screenshot tool. To confirm the same you can refer to the command below.
mangesh@itsmarttricks:~$ sudo dpkg -l shutter
Desired=Unknown/Install/Remove/Purge/Hold
| Status=Not/Inst/Conf-files/Unpacked/halF-conf/Half-inst/trig-aWait/Trig-pend
|/ Err?=(none)/Reinst-required (Status,Err: uppercase=bad)
||/ Name Version Architecture Description
+++-==============-============-============-=================================
ii shutter 0.94-1 all feature-rich screenshot program
To open the Shutter screenshot tool, type only the shutter on the command prompt. See the command below.
mangesh@itsmarttricks:~$ shutter

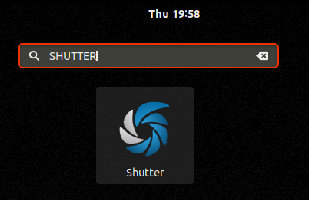
You can also open a shutter screenshot application graphically through the Package Manager. See the snapshot below.

Also Read – How to Install Latest GIMP 2.10 in Ubuntu
How To Uninstall Shutter Screenshot Tool in Ubuntu?
For any reasons, if you don’t like Shutter Screenshot Tool and want to uninstall the application from your system using the following command.
mangesh@itsmarttricks:~$ sudo dpkg -r shutter
[sudo] password for mangesh:
(Reading database ... 126466 files and directories currently installed.)
Removing shutter (0.94-1) ...
Processing triggers for man-db (2.8.3-2) ...
Processing triggers for hicolor-icon-theme (0.17-2) ...
Processing triggers for gnome-menus (3.13.3-11ubuntu1) ...
Processing triggers for desktop-file-utils (0.23-1ubuntu3.18.04.1) ...
Processing triggers for mime-support (3.60ubuntu1) ...
That’s all, In this article, we have explained How to install Shutter Screenshot Tool in Ubuntu – A Best Screenshot Tool For Linux. If you like this article, then just share it and then do subscribe to email alerts for Linux, Windows, macOS, Android, Internet, Firewall and Security, CCTV tutorials. If you have any questions or doubts about this article, please comment.
